How to set up a CCTV IP camera?
This tutorial covers setting up an IP CCTV camera. There are three ways to connect your IP camera.
- You can connect an IP camera to local area network – connecting an IP camera is quite easy, connect IP camera to your router with CAT5 cable. In order to set up an IP camera, you may have to initially connect wired and once it is configured and setting applied, then you can remove the wire and it can work as wireless IP camera.
2. Connecting an IP camera via PPPoE – You need to set PPPoE dialling parameters, enter the user name and password of ISP.
3. Connecting IP camera to PC – this is very uncommon way to connect IP camera. You can connect it to a PC and then configure the IP camera.
Steps in configuring an IP CCTV camera
Step1 –
Find utility/camera management software – camera manufacturer will provide a utility software, in most cases you will find a CD along with the camera or you can download it from manufacturer’s website. You can also find some third party software which can be used to change parameters.
Step2 –
Open the executable file and locate the camera in the local area network. You should make sure your PC or Mac is connected to the same local area network.
Figure 1 – IP Installer V2.2
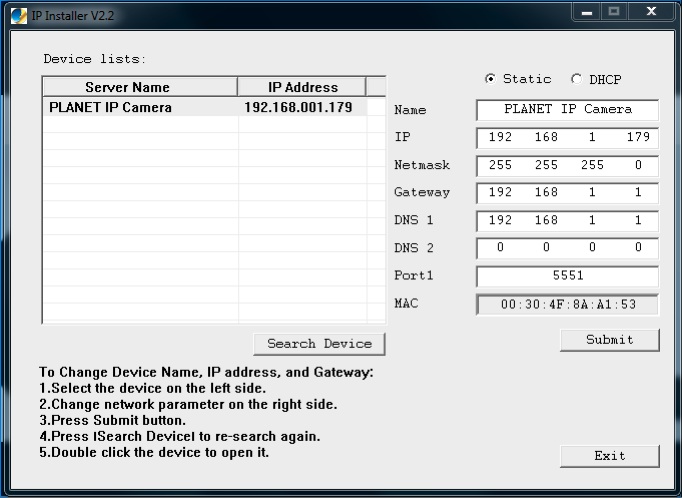
IP installer V2.2 is one of the common software used by many IP cameras.
Step3 –
Click the camera and parameters will appear on the right side of the popup menu. You can change the value according to your local area TCP/IP.
Step 4 –
Open
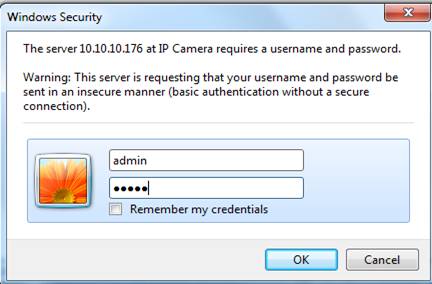
an internet browser (internet explorer is often supported by most IP cameras), type the IP address of the camera in the following format http://192.168.1.179:5551/
This will prompt you to enter the default user name and password of the camera.
Figure 2 (IP camera interface)
Step 5-
Once you have entered the username and the password, it will run active X controls. This may take few minutes before it gives security warning.
Figure 3 – (Active X controls warning)
Step 6-
Right click and download Active X.
Note: every IP camera has their own Active X download, in some cases you may need to download it from the CD provided with the camera.
Step 7 –
Now you see your IP camera and if required you can customise the configuration.
I trust that you enjoyed this tutorial, please share this with your buddies.
Our next CCTV installation course starts on
Please click here for more info about next CCTV installation course